|
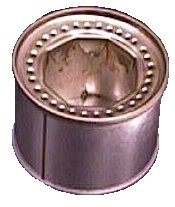 |
Make Your Own Backpacking Alcohol Burning Stove
|
 |
|
MATERIALS LIST:
The following materials will be needed to make the stove:
- Tin snips
- Metal file
- Hammer
- Power drill
- 1/2 inch drill bit
- Ruler
- Permanent marker
- Paper stapler
- Two 6 oz tomato paste cans (empty and washed)
- One pop can (also empty and washed)
- A couple of thumbtacks
- Fingernail polish remover, Acetone, MEK (methyl ethyl ketone), or equivalent solvent
- Cottonballs
|
INSTRUCTIONS:
STEP #1:
 Remove the labels from the two empty tomato paste cans. After removal of the paper labels some glue may still be present on the tin cans. Remove this dried glue from the cans by soaking a cottonball with fingernail polish remover and rubbing the dried adhesive until it is completely removed. Remove the labels from the two empty tomato paste cans. After removal of the paper labels some glue may still be present on the tin cans. Remove this dried glue from the cans by soaking a cottonball with fingernail polish remover and rubbing the dried adhesive until it is completely removed.
|
STEP #2:
 Using the ruler and the marker, measure up 1.5 inches from the bottom of one of the tin cans and mark all the way around the tin can with the marker at the 1.5 inch mark. Set this can aside. This can will be the base of the stove. On the second tin can, measure 1 inch up from the bottom and mark the 1 inch line all the way around this can on this second can. This can will be used as the burner portion of the stove. Take the tin snips and cut the cans off at the 1.5 and 1 inch lines. File down the sharp edges with the metal file for safety. Using the ruler and the marker, measure up 1.5 inches from the bottom of one of the tin cans and mark all the way around the tin can with the marker at the 1.5 inch mark. Set this can aside. This can will be the base of the stove. On the second tin can, measure 1 inch up from the bottom and mark the 1 inch line all the way around this can on this second can. This can will be used as the burner portion of the stove. Take the tin snips and cut the cans off at the 1.5 and 1 inch lines. File down the sharp edges with the metal file for safety.
|
STEP #3:
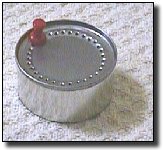 Measure 1/4 inch in from the edge of the 1 inch tall can and punch 32 holes around the inside of the bottom of the can with the thumb tack. This creates the burner holes where the fuel will vaporize out of the stove once it is heated by the burning fuel. It will be hard to puncture through the tin can with the thumbtack but the reason that thumbtacks were used in this step was because they make extremely small holes. You can also use the smallest drillbit possible to drill the holes if punching holes in the bottom is too difficult with a thumbtack. Measure 1/4 inch in from the edge of the 1 inch tall can and punch 32 holes around the inside of the bottom of the can with the thumb tack. This creates the burner holes where the fuel will vaporize out of the stove once it is heated by the burning fuel. It will be hard to puncture through the tin can with the thumbtack but the reason that thumbtacks were used in this step was because they make extremely small holes. You can also use the smallest drillbit possible to drill the holes if punching holes in the bottom is too difficult with a thumbtack.
|
STEP #4:
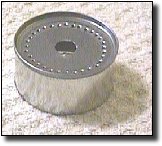 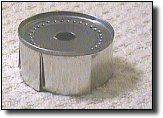
Drill a 1/2 inch hole in the bottom center of the 1 inch tall can. Using the tin snips, cut 6 to 8 slits in the sides of the 1 inch tall can cutting all the way to the bottom of the can. This will allow the burner portion of the stove to be inserted into the base of the stove.
|
STEP #5:
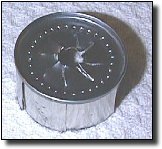
Then, using the tin snips, cut 8 slits in the bottom of the 1 inch tin can to within 1/8 inch of the holes that are punched in the bottom of the tin can.
|
STEP #6:
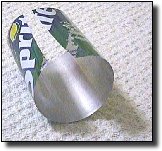 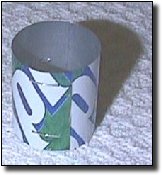
Using the tin snips, cut open the aluminum pop can. Using a marker and a straight edge, mark and cut out a 1 3/8 inch by 5 inch inch strip from the aluminum pop can. A scissors can be used in this step in replacement of the tin snips because a cleaner cut may be possible using a scissors. Roll the strip into a cylinder with a diameter slightly smaller than the holes in the burner of the stove and staple the circle in place. The cylinder should be 1 3/8 inches high if properly made. Using the scissors or the tin snips, cut 4 triangular notches in the aluminum circle roughly 1/8 to 1/4 inches deep.
|
STEP #7:
 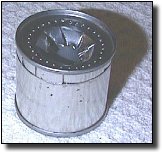
Place the circle of aluminum in the base of the stove (triangular notches pointing down) centering it within the base. Carefully bend the flaps on the burner section inward and place the burner section inside the base of the stove pressing down slowly and gently. Press the burner into the base until it only has 1/4 to 1/8 inch to go before it is completely sealed.
|
STEP #8:
Make sure that the circle of aluminum is still centered in the stove. If it is not, take a pencil or equivalent and move it into the center of the stove. Once the aluminum circle is centered, slowly compress the burner section the remainder of the way into the base. The circle of aluminum should be securely in place at this point. |
STEP #9:

CAREFULLY press the flaps in the burner of the stove down one at a time. Press one down a little bit and move onto the next one. You may have to circle the stove 5 or 6 times pressing each flap down slowly and evenly. These flaps hold the aluminum circle centered in the stove. When completed, the flaps should be flush with the aluminum circle.
|
STEP #10:
As an added measure, take a hammer and tap all the way around the edge of the burner section to firmly secure it in the base section of the stove. If you have problems with it staying down give it a really good rap all the way around with the hammer (taking care not to squash the stove in the process). With enough nudging the burner portion of the stove will stay put.
Return to the Make Your Own Backpacking Alcohol Burning Stove and Pot Stand page... |
|
Copyright 1998, Shaneo's Sites
http://www.fulton-net.com/~sgraber/makestove.htm
|