|
|
| Editor's note: John O'Mahoney slimming a very popular Sierra Zip stove by following Tom Conover's instructions. A detailed how-to for those backpackers appreciating wood burning cooking. |
|
TOM'S ULTRALIGHT Let me start off saying I love a wood burning fire while backpacking. With this said the logical think to do is buy a wood burning stove. So several years ago this is just what I did do. I bought a Zip Sierra Stove and have had a smile on my face since that day. Over the years I'll enjoyed using a wide assortment of stoves, but I always seem to gravitate back to the ZIP stove. Recently I started e-mailing another backpacker Tom Conover with similar interests in the Zip stove. He being an engineer and an ultralight backpacker was also driven to lighten his backpack weight. He had some great ideas to reduce the weight of the Zip stove. 20 ounces is weight of stove including grate and wind screen. Using his engineering skills he has reduced the weight of the Zip stove from 20 ounces to 8.5 ounces. You heard right 8.5 ounces. The story hasn't ended as yet in reducing additional ounces from the Zip stove. Additional weight savings are being tested as I write. We could see a 7 ounce Zip stove when all is done. You ask how? I'll tell you how Tom did it. 1. The inner burn chamber to the Zip stove is aluminium. This was replaced with a lighter weight Evernew titanium sierra cup minus the metal handle and vent holes drilled on side of sierra cup. 2. The 3 way switch was replaced with a lighter weight 3 position slide switch. 3. The base that holds the fan,motor and supports the burn chamber was replaced with a lighter guage aluminium base. 4. A solar panel was added to extend the life of the AA battery. 5. The standard aluminium battery case was replaced with a lighter weight plastic AA battery holder. 6. The grate was replaced with a lighter guage aluminium grate. So basically those are the changes made to the ZIP stove at a weight savings of 11.5 ounces. The ZIP is now a true ultralight stove:)
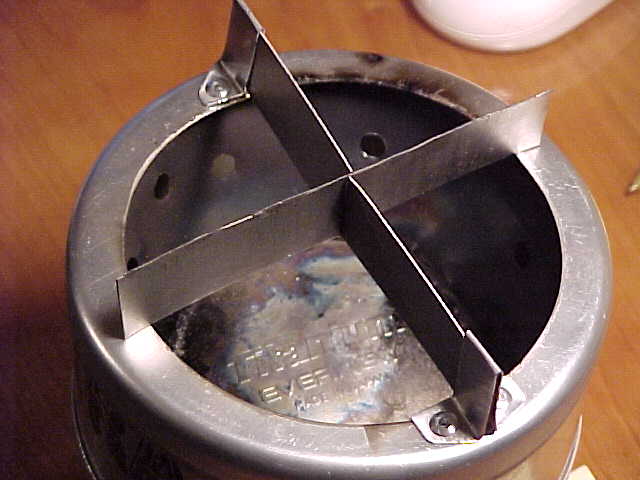
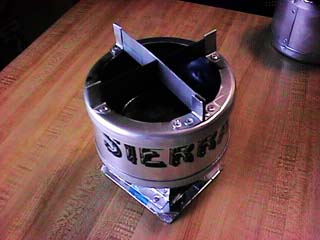
This photo shows the Evernew Titanium sierra cup being used as the burn chamber and the modified grate for the new ultralight Zip stove.
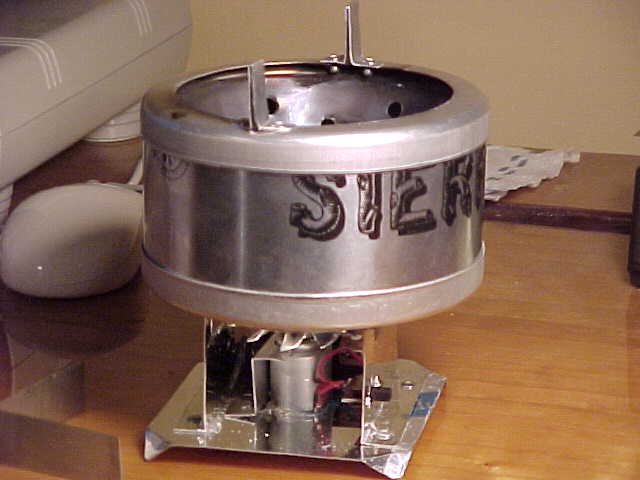
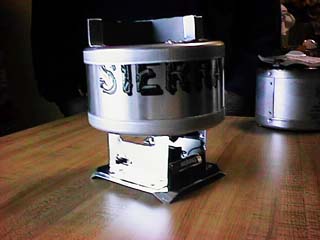
This photo shows that the outer aluminium case to Zip stove was cut down due to the use of the sierra cup, it also shows the 3 way slide switch, lighter guage aluminium base for the Zip stove and 2 brackets to for securing grate. On the side not shown is the battery holder and attachment for solar panel. Here it is your 8.5 ounce Ultralight ZIP STOVE
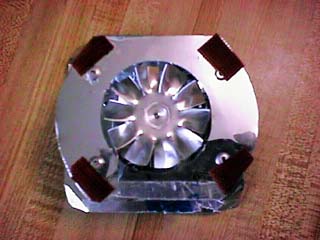
More to come so stop back and watch Tom perform his magic. I'll be posting more detailed picture of method used to modify Zip stove shortly. Detailed Information On Ultralight ZIP Stove This will be the first closeup photos of the Ultralight ZIP Stove. More information and photos will be posted at a later date. Weight of this model of ZIP stove is a hair under 8 ounces. What more can be done to lower this weight?????? This photo shows the the lower unit to the ZIP. Weight on standard factory unit is ounces. Weight for this part of the Ultralight ZIP Stove is ounces
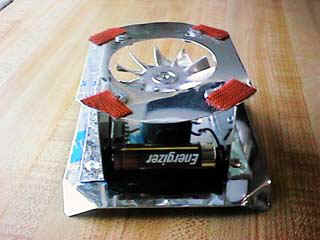
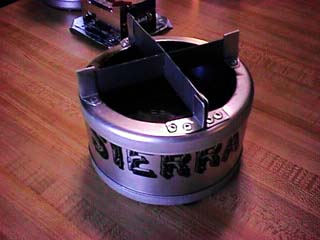
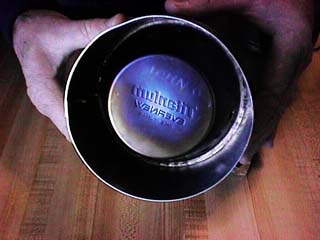
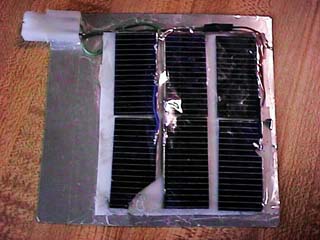
This photo shows the burn chamber for the ZIP and grate. Weight on standard factory unit is ounces. Weight for this part of the Ultralight ZIP Stove is ounces This shows the 2 sections ready for use. The velcro strips work quite well to hold unit together. Just like the tabs from the factory unit. This photo shows the stove with the grate set-up. Using the grate one can cook a small sierra cup and it also increases the amount of fuel that can be put into burn chamber. This photo is looking at the Evernew Titanium sierra cup which is now the burn chamber for the ZIP stove. It fits perfectly and is held in place by a few rivets. This photo is just looking down at the lower unit. This is a photo of solar panel for ZIP stove. It really works and can extend the life of the battery quite a bit. Its really a neat addition and fun to use. On a REAL HOT day you got your own portable fan to cool you off. That would be awesome to set this up at a shelter and turn on the fan and cool yourself off. The above photos were taken my Michael Connick with his digital camera
Here are detailed directions on modifing ZIP stove from Tom Conover Materials:
(approx.25) rivets 1/8"dia.xl/4"lg (arrow brand RSA 1/8) (1) REI titanium sierra cup #607224 (I SF) lightweight aluminum sheet (2 in.Velcro) Tools: Drill or drill press metal file tin snips Rivet gun Low wattage soldering iron Small screwdriver Hammer Make Base: Cut base components from aluminum sheet. Bend vertical support pieces. Place in vise and tap lightly for a good corner. Drill vertical pieces for rivets and make a slot for switch by drilling a 1/4"dia. hole and elongating it slightly to accomodate the switch travel. Also, drill small holes to mount switch. Mount switch to vertical plate. Drill base plate for motor housing its about 11/32"dia. and should be centered in baseplate. If retro fitting an old motor and motor has screws drill base for these also. If not you need to secure the motor to base somehow. Newer units have a piece of bent aluminum that can be cut in half and used or you can bend one yourself from sheet. Drill two holes in this bracket to rivet it to base. If using newer motors you need a piece of insulating material between motor and baseplate as the wire leads would both contact the base and short the circuit. Attach motor to baseplate with bracket and rivets. Drill two holes in the battery holder and rivet to baseplate. Cut little tabs off the battery holder at center on outboard side to facilitate battery replacement. The vertical side pieces are noe riveted to the baseplate. They butt up against the battery holder. Should be 2 3/8" back to back. Rivet upper piece that forms surface for upper unit to sety on. Solder wires to motor leads and switch and you can test the base unit for operation. Upper Unit: Remove wire handle from Sierra cup. Flatten out metal that held wire handle. Drill holes in cup. Something around 3/16"dia. evenly spaced around periphery two rows vertically with about 8 holes in each row. Push the Sierra cup into the top aluminum ring of the Upper unit that Zzmfg. supplies. You can tap it into place with a flat end punch to hold it a little more securely. You may want to shorten the length of the cylinder that is the middle piece of this assy. as the Sierra cup is not as deep as the original burn pot from Zzmfg.. Leave about 1/2" below the bottom of the Sierra cup and the lower aluminum ring. Drill upper ring for 4 pot supports at 90 degree intervals. Bend the 4 pots supports from aluminum sheet. They should be as high as the height of grate if you plan to use one. Grate can is just two pieces equal length that will span top of unit and engage pot rests. Cut narrow slot at center of them so they will engage each other half way. One of the pot rests needs to have top open to facilitate inserting the last grate leg from above as it cannot be inserted from horizontal as the other three were. Add velcro to bottom of upper unit and base unit to keep them from slipping apart while using. I have not riveted three piece upper unit together but it may be something you would want to do to keep it from con),ming apart. Its a pretty snug fit. Bend down corners of baseunit for better stability. Thats about it. A little trial assembly is a good idea while assembling unit. I also usually use one set of holes on pieces to be joined as a guide to locate corresponding holes in part that it rivets to. Otherwise it is expecting a little too much for them to match up precisely.
|
The Author's Website: http://www.monmouth.com/%7Ejohno/ |
